Flashing Tasmota on Sonoff (Revised)
This post is an update to my previous “Changing Sonoff Firmware (Visual Guide)”, and is based on the following Youtube video which makes use of a much simpler flashing method.
All credits to Justin from DrZzs - keep up the good work!
Required Hardware
If you are planning to follow along with this blog post, you will require the following items:
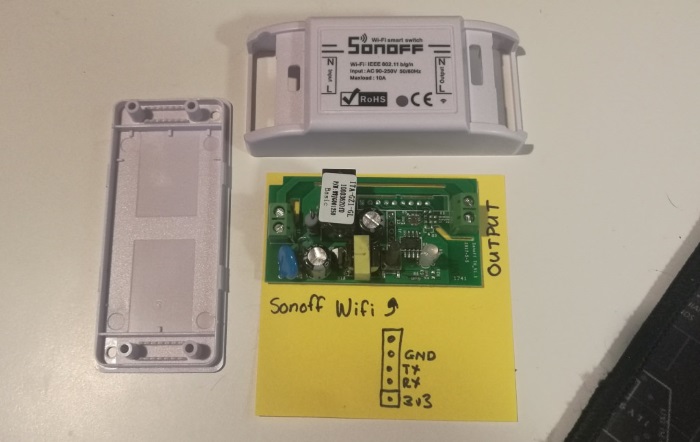
- Sonoff WiFi Smart Switch
- Jumper / Dupont wires
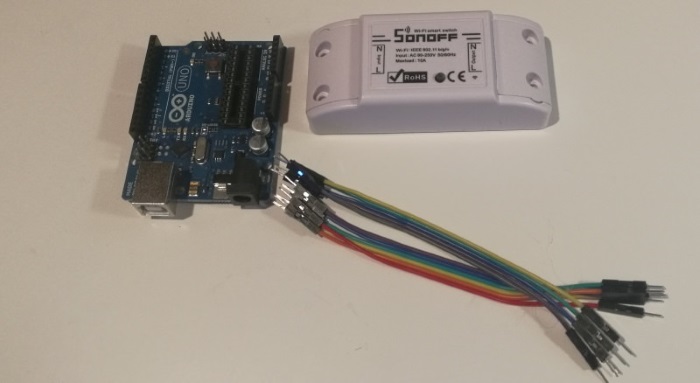
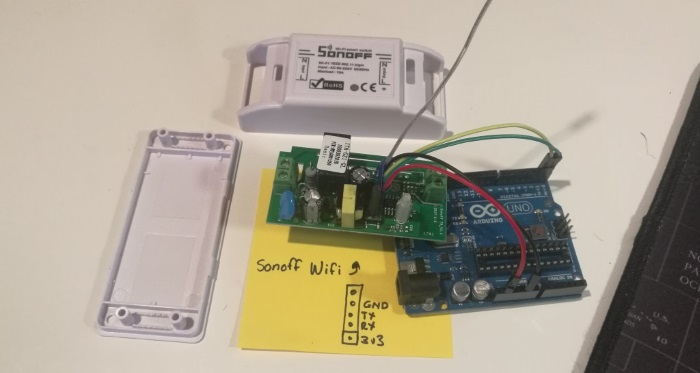
- ISP programmer (or in my case an Arduino UNO with the chip removed)
ESP8266 tools & Arduino
To save on some time and to try to keep this post short, I am going to assume that you have the ESP8266 community tools already installed alongside your Arduino IDE, if you do not this post will get you up and running quickly.
Download Tasmota
You are going to need the latest stable build of the Tasmota firmware, you can download it from the link below (please be sure to download the Source Code (zip) release).
- https://github.com/arendst/Sonoff-Tasmota/releases
Once downloaded, extract the contents of the zip file to a local folder on your computer and ensure that your Arduino IDE is closed - we are going to be updating your Arduino’s libraries folder with the ones included in the Tasmota zip file. To do this you will need to copy all contents from C:\<extracted-folder>\Sonoff-Tasmota-x.xx.x\lib into C:\Users\<user>\Documents\Arduino\libraries.
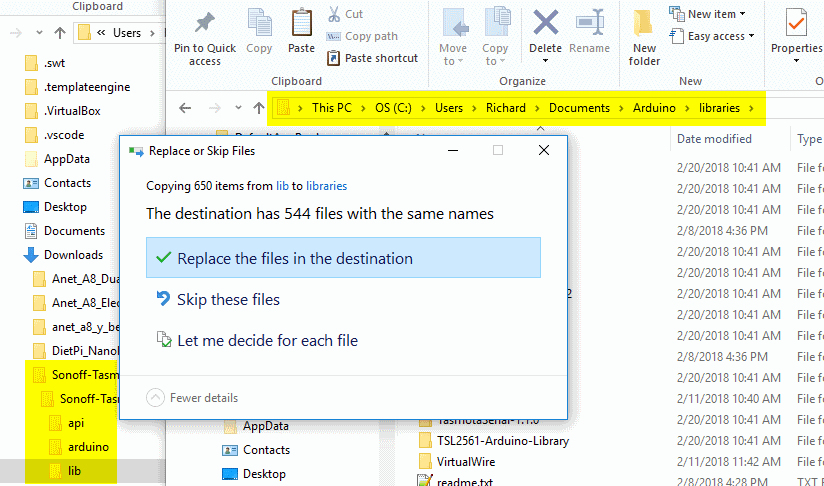
NOTE: ensure that you replace any existing libraries with the ones provided!
Configure Tasmota
This is the section where all the magic happens, and shows how much work has been put into the actual Tasmota firmware by the developers. Unlike my original flashing guide this method is 100 times simpler and more robust should your network become completely unreachable to your Sonoff device.
The only configuration change we are going to make to the Tasmota firmware is tell it to enter into WIFI_MANAGER mode whenever it is unable to connect to any of the configured WiFi networks, in this case the Sonoff will enter Access Point (AP) mode and host its own WiFi network for you to connect to and configure the device. No more hacking about configuration ever!
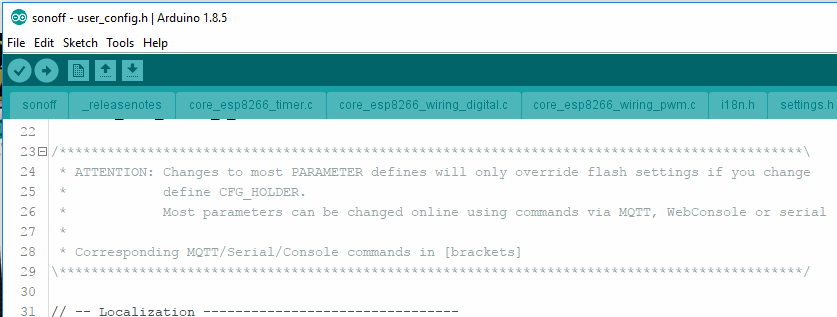
We will need to open the “project” in the Arduino IDE, locate and open the sonoff.ino sketch file in the unpacked Tasmota firmware folder, in my case it was found here: C:\Users\Richard\Downloads\Sonoff-Tasmota-5.12.0\sonoff\sonoff.ino
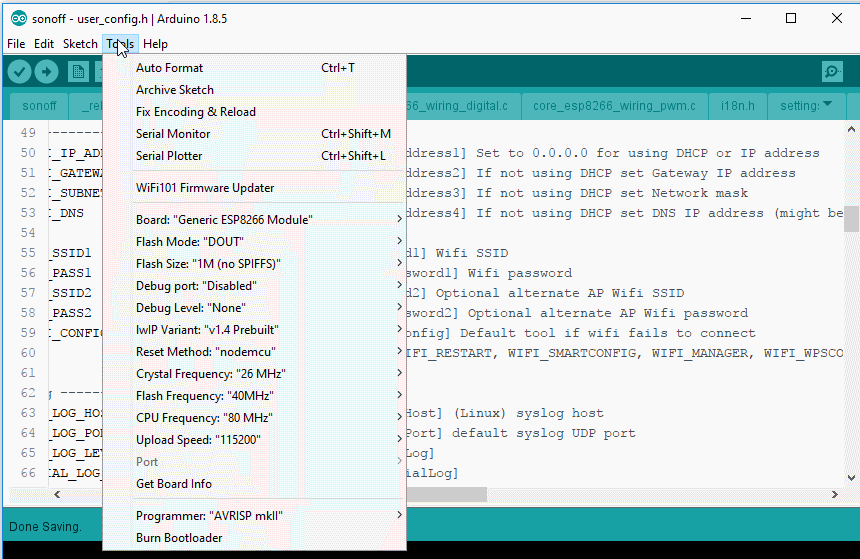
Once open, locate the userconfig.h file in the open tabs as shown below:
Locate the following line …
#define WIFI_CONFIG_TOOL WIFI_WPSCONFIG
… and replace WIFI_WPSCONFIG with WIFI_MANAGER like shown below.
#define WIFI_CONFIG_TOOL WIFI_MANAGER
That’s all we need to do for our configuration, it’s that simple.
Pro Tip: Make a Flash Cable
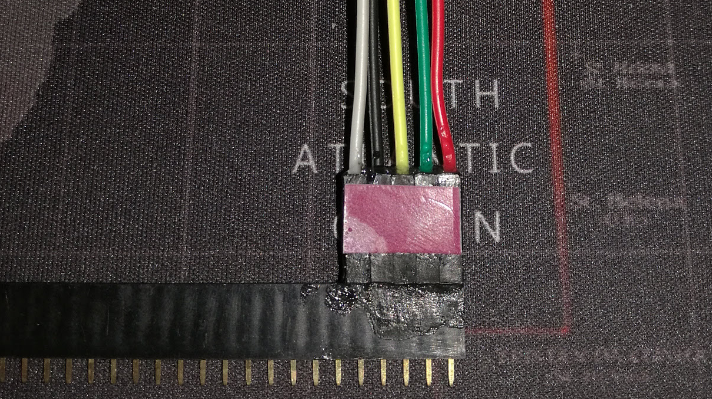
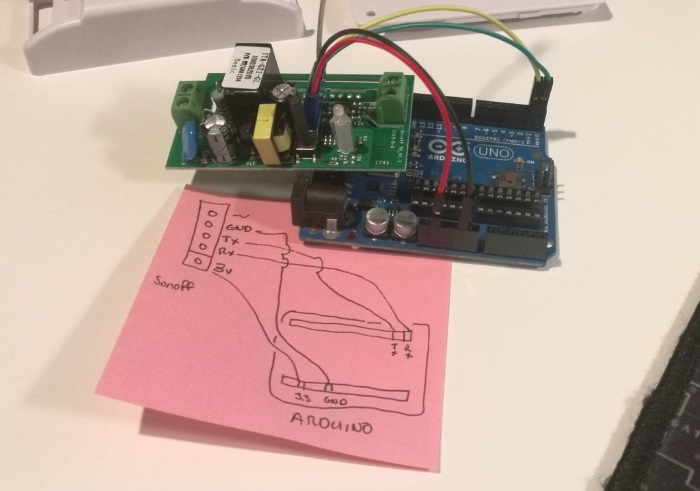
I find that the simplest way to flash my Sonoffs is to make my own flashing cable using 4 (or 5) Dupont cables. I normally use a female header to align them, and join them together using some super glue and a bit or cardboard.
Once I have made my “programming header / cable” I use one of my Arduino UNOboards with the processor removed as an ISP flasher. The connection from my cable to the Arduino UNO board is as shown in the below diagram (please note the orientation of the Sonoff board).
This method of connecting to the Sonoff saves me a lot of time / solder and male header connectors - just be sure that you are making a good electrical connection to the programming headers when flashing the sketch!
Verify the Firmware
The next thing we need to do before attempting to flash the Tasmota firmware to our device is to compile it. Depending on your computer’s performance this could take a while, and depending on whether you copied the libraries or not, you may need to address some compilation issues.
The next thing we need to do before attempting to flash the Tasmota firmware to our device is to compile it. Depending on your computer’s performance this could take a while, and depending on whether you copied the libraries or not, you may need to address some compilation issues.
1
2
3
4
5
6
7
8
9
10
11
Board:         Generic "ESP8266 Module"
Flash Mode:    DOUT
Flash Size:    1M (no SPIFFS)
Debug Port:    Disabled
Debug Level:   None
IwIP Variant:  "v1.4 Prebuilt"
Reset Method:  "nodemcu"
Crystal Freq:  26 MHz
Flash Freq:    40 MHz
CPU Freq:      80 MHz
Upload Speed:  115200
Once you have verified, and are happy with your board configuration press the tick to start compiling / verifying the firmware (this can take a while). Hopefully everything goes well and you end up with success as shown below.

Connect your Sonoff
Next we will need to connect an ISP to the programming headers on your Sonoff device, depending on what ISP you are using this can vary slightly, however the general principle is the same. As mentioned earlier I am making use of an old Arduino UNO board with the processor removed as my programmer. Below you can see how I hooked it all up.
NOTE: Read below before powering up your ISP / Sonoff
In order to flash the Tasmota firmware we are going to need to place the Sonoff into flashing mode when powering it up, this is pretty simple and is achieved by the following steps:
- Ensure that your Sonoff is disconnected from mains!
- Ensure that your Sonoff is off
- Press and hold down the button of the Sonoff
- Connect power to the Sonoff (i.e. plug in your ISP) while keeping the button pressed
- Wait 5 seconds and release the button
If done correctly the light on the Sonoff should remain off, if it is flashing your timing is out and you will need to disconnect the power and try again.
Upload the firmware
When the connection has been made, and the Sonoff is in flashing mode (done by holding down the push button when powering up the device), press the upload button in the Arduino IDE to flash Tasmota to your device. The upload will take a while to complete and should output as shown below:
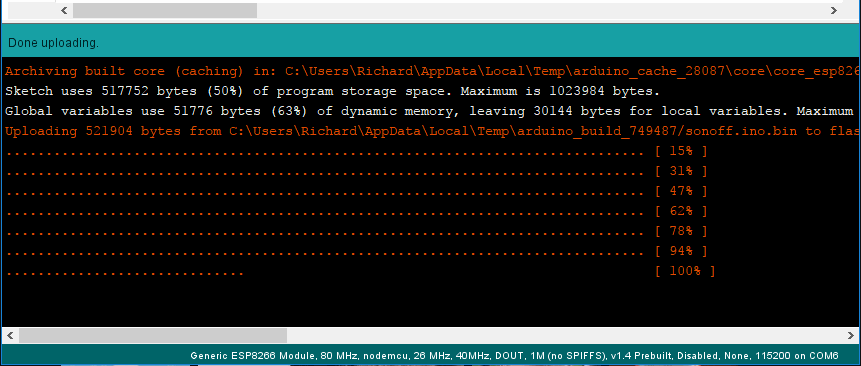
After the upload has completed your Sonoff should reboot and blink the green status LED indicating that it was unable to connect to a WiFi network, and as a result is in configuration / access point mode.

Connect and configure
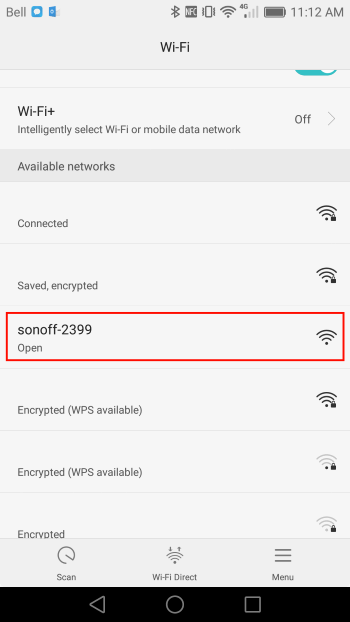
When your Sonoff first powers on it won’t be able to connect to your WiFi network and will put itself into Access Point mode, this is indicated by the rapidly flashing green LED above. When the Sonoff is in AP mode it will create its own WiFi network that you can connect to with your phone / laptop and configure, in my case the sonoff-2399 network was created.
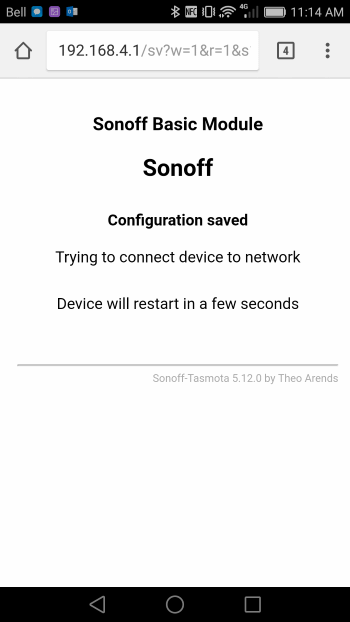
Connecting to this WiFi network should launch your web browser and bring up the Tasmota configuration page, here you are free to configure the Sonoff device as you would normally do, once complete just restart the Sonoff and it will boot up using the new settings and connect to your home WiFi network.
Pro Tip: Use Fing for a good time
If you are like me and want to assign a static IP Address to your Sonoff once it has booted, or do not know what the initial IP Address assigned to it by your router is you can make use of Fing on your mobile device to discover your Sonoff:
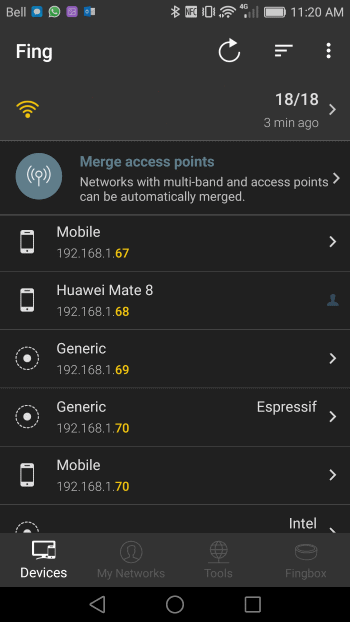
Once you know the IP and MAC address of the Sonoff you can make it static on your router :)
Final thoughts
Although this was a long post I do feel that the overall process of flashing the Sonoff was a log simpler and quicker, thanks to the following factors:
- The use of a custom programming cable - no need to solder
- The simple change to configure AP mode is a no-brainer going forward
- The ease of setup once you connect to the Sonoff
- The fact that the Arduino IDE cached the build file allowing me to flash multiple sonoff devices quicker
This will be my preferred method of flashing new Sonoff devices going forward - or at least until an even simpler way is found!
As always, I hope that you found this post both interesting and informative. I always welcome feedback and comments as this is a learning experience for me too.
Comments powered by Disqus.